
|
|
|
|
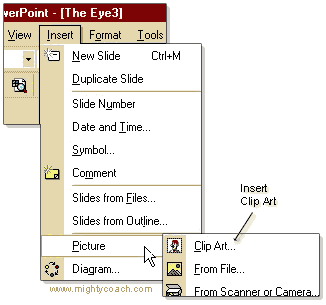
The following article is a transcript from a our video product, "Intro to Powerpoint XP." Powerpoint XP comes pre-packaged with a number of graphics, or "clipart" images that you can use in your presentation. These clipart images can be placed directly onto slides exactly the same way that photographs can. To insert a clip-art graphic onto your slide, go to the file-menu and click [Insert - Picture - Clipart]. The first time you try this, the "clip organizer" will take over, and attempt to scan through your entire computer for all possible clip art pictures. Any picture on your computer is fair game, and it will take the clip organizer quite a while (more than 10 minutes) to make this initial survey. Don't worry, though ... as this search is never repeated again.
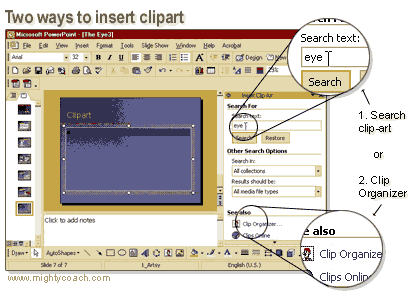
After this initial setup, inserting clipart is easy. Once again, click [Insert - Picture - Clipart]. When you do this, the clip-art selection options will appear in your right Task Pane. You now have two separate methods for finding a suitable piece of clipart:
1. You can run a search. 2. You can
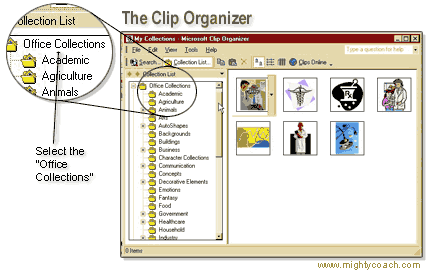
run the clip organizer. When you run the clip organizer, you get a file-directory of all available clipart. Go to the folder "Office Collections" and search through these file categories of pictures until you find one that you want. The "office collections" are the actual clipart pictures that came bundled with Office, and are divided into useful categories, such as Animals or Healthcare.
After you find an clip-art image and place it on your slide, you can manipulate, rotate, and resize it just like you would any other photograph or picture. Next: Changing
our images look and properties ...
|
|||||||||||||||||