|


forgot
your password?


|
Turn
your photos into a "video slideshow" using Movie Maker 2.0
Last
updated 6-12-03
I f you have a series of pictures on your computer, say, from
a digital camera, you can turn these pictures into a video. MovieMaker
2 has a storyboard mode that makes it really easy to turn your photos
into a “video slideshow.” Simply import your photographs and
drop them onto the storyboard in the order you prefer.
After you’ve placed your pictures, you can do a bunch of great
things to your photos to spice up your video presentation:
- Rearrange your
pictures.
The storyboard shows little thumbnails of your pictures – this
makes it easy to rearrange, move, and delete pictures from your movie.
Just click on the thumbnail with your mouse, and drag it into position.
- Rotate your pictures.
Some of your pictures may be rotated wrong (if you held your camera
sideways for a vertical photo). Fortunately, Movie Maker has a series
of rotation video-effects that will fix this. Simply open up the Video
Effects collection, and drag the rotation effect onto your picture in
the storyboard to make it right-side-up.
- Fix your pictures.
The video effects that come bundled with Movie Maker will all work on
your pictures as well. That means you’ll be able to perform basic
photo manipulation … for example, you could lighten or darken
your pictures if they aren’t exposed properly.
- Add transitions.
You can add transitions between each of your pictures by dragging the
transition effects onto the storyboard. Most of the included transitions
are rather “over-the-top,” but they look great with pictures.
- Add music or a
voice track.
You can easily add a music track, or narrate your photo video. You’ll
need to do one of these things because your movie won’t have any
sound otherwise.
There is one thing you should keep in mind when laying your pictures
onto the timeline … and that is picture duration. By default, when
you place a picture on the timeline it will stay on the screen for 5 seconds
before moving to the next picture. When you start add transitions (which
take time, themselves) this time drops down to around 3 seconds. This
may not be enough time for you, especially if you are trying to narrate
your slideshow, so you may need to change the timing of each of your photos.
- By going into the timeline view and “trimming” each picture.
Simply grab the beginning or end of each picture and drag it to the
desired length.
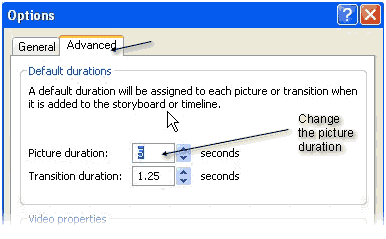
- By changing your timing options. You can change the default 5-second
duration to any length of time you like … you could even set your
duration very short in order to make your own “stop motion”
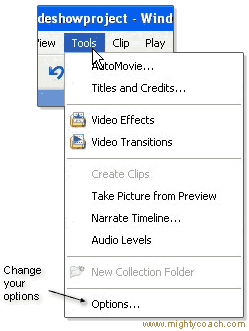
movie. Simply go to the menu bar, and click [tools – options],
then click on the advanced tab and change this setting. Note that this
duration change only effect new pictures as you lay them on the storyboard
… and won’t effect the pictures you’ve already placed
into position.
Next: Advanced
title tricks
Or: See all our Movie Maker 2 articles
and tips!
 |
 |
 |
Go right ahead! You can even copy and
use the pictures. We only ask that you include the following sentence
(and link) at the bottom of the article: |
| You can find
more useful home-video "tips and tricks" like this one at
www.mightycoach.com
- they even have an online-video course that teaches you to edit video
on your home computer! |
|
|